Wednesday, December 10, 2008

Creating a sculptie from a 2D curve

Albatross 3D offers a "lathe" function that allow the creation of revolution solids. For those familiar with ROKURO this shouldn't sound new.

Here is how to create a spherical sculptie using a 2D curve and the leathe function. With some modification it can be adapted to cylindrical sculpties but this is left as an exercise for the reader :)

We'll make use of the "2DCurve" and the "Lathe" functions that are located in the "Create" section of the toolbox:


Click on the "2DCurve" button and you can start define the profile of your object. Click on the "Line" type on the left and define 9 control points in the parameter area on the right (it is essential to make the object work with the sculpt exporter):


Now modify the profile at your leisure but keep the end points on the x axis. Do not cross the x axis or you will have a self intersecting model. When done press the "OK" button on the left bottom corner.


Now click on the "Lathe" button:


and you will get a 3D solid that is generated by the rotation of your profile around the x axis. Well, actually the rotation is around the two endpoints of the curve but in this example we left them on the x axis.


In the parameter area on the right set the proper subdivision: 4 and the number of steps: 32. Those are not magic numbers. We started with 9 control points so our profile has 8 segments, we want a 32x32 mesh so we multiply the number of segments by 4! If you had started with 17 control points here you would have multiplied by 2.

You can still adjust your profile at this time and directly see the effect on your 3D model! This is a great way to refine the control points so that faces are more evenly distributed (this is very useful when texturing!)

Click on OK when you are happy with the shape you got.


Now, unfortunately, we are not done yet! You can notice on the right that our solid has 994 vertices and this is wrong, it should have 962 vertices to be successfully exported to SL.


The problem is that we have one subdivision more than we should and this accounts for the 32 vertices in excess. The simplest way is to remove a loop of vertices that is "inside" the solid:


If you experience any issue while removing the verices in excess, look at my previous post for a safe way to do so.

Now that the excess vertices are gone, the solid has the right number of vertices,


and can be exported to a sculpty map:
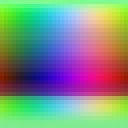


that can be imported in SL:
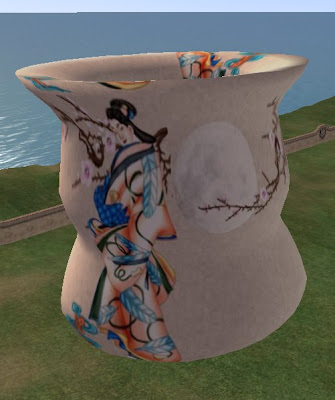
Removing a loop of vertices

Removing a loop of vertices can sometimes lead to unexpected results on the model. If this happens to you, here is a safe technique that always works (but requires you to do more work!

First delete the loop of edges the vertices belong to. Use the "Select Tools/Loop" function to do it quickly.


As you can see in the next picture, this doesn't remove the vertices themselves!


so they will have to be removed one by one. I use the rectangle selection to do it more quickly:


And here's the result: the vertices are gone and the faces have been merged correctly:

Monday, December 8, 2008

UV mapping for sculpties

For simplicity let's discuss a sphere 4x3, the same principles will apply to a sphere with 32 vertices per slice.

Here is the sphere.


Ok, it doesn't look much like a sphere, but with a stress of imagination ...

Vertices are numbered 0-9 and faces designated with letters a-p (only some of the visibile elements have been marked to avoid confusion).


Here is how the vertices are connected with the association faces -> vertices:


Now, the UV mapping for each face is:

Friday, December 5, 2008

Creating planar sculpties

The current export plugin is also capable of exporting sculpties with planar stiching.

Simply start from an object "Grid" (see picture below) with one of the following subdivisions: 7x7, 15x15, 31x31, 64x64.

The model in Albatross3D:


the corresponding sculpt map:


and the rendering in SL:

Thursday, December 4, 2008

Creating Cylindrical sculpties

The exporter has been updated to create sculpties with a cyilindrical stitching.

Just start from a cylinder and the exporter will figure out the proper stitching to use.

Available sizes are 7x8, 15x16, 31x32 and 63x64 cylinders.

The new plugin is available on the project page: http://code.google.com/p/a3dsculpt/

Here a model in Albatross3D:


its sculpt map:


and its rendering in SL:

Saturday, November 29, 2008

Assign same z to a set of faces

Here the lattice modifier is your friend.
I started from a 16x15 sphere and applied a lattice modifier with 16 subdivisions along z.

Then I selected the control points four at time and lowered the corresponding slices down.

Here is the result:


Thursday, November 27, 2008

Creating sculpties with Albatross3D

First of all you should have downloaded Albatross3d from the website http://www.ppmodeler.com. I've used the version for Windows published on Jun 2008.

Then you should get the exporter files and copy it in the scripts subdirectory of the Albatross installation directory.

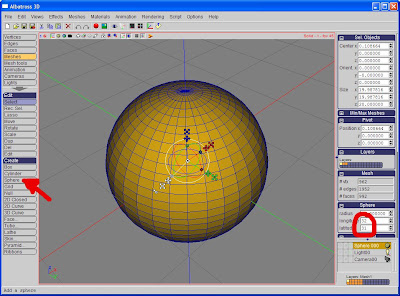
Now start Albatross and create a sphere with longitude 32 and latitude 31 (see picture).


The exporter currently works with spheres 8x7, 16x15, 32x31 and 64x63.

Now modify your sphere moving the vertices and the faces or using the sculpting function or applying the modification tools (i.e. do not add or remove vertices).

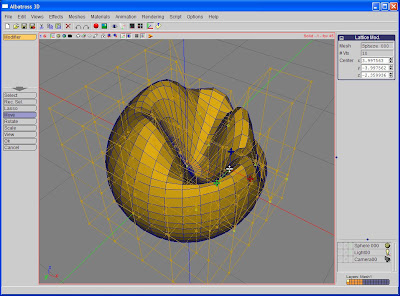
The following picture shows the lattice modifier:


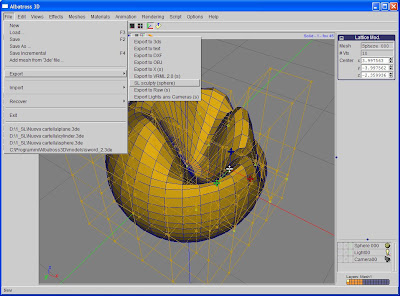
Now you simply export the model to a sculpty:


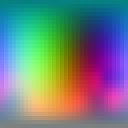
to obtain a 128x128 bitmap:


that you can upload into SL.